How to safely and effectively polish Subaru paint by hand and machine
 24 January 2008, 07:26 PM
#1
Former Sponsor
Thread Starter
iTrader: (3)

Join Date: Feb 2006
Location: AB51 0TH
Posts: 2,562
Likes: 0
Received 0 Likes
on
0 Posts
One of the questions that pops up time and time again on here is how do I remove swirl marks and scratches from my paint? Rather than continuing to answer these questions one by one, I thought I would take the time to write a pictorial guide instead. This will hopefully save me some time on the forums, and also serve to reinforce the methods and products we recommend for this task. Some of you will be aiming to try and correct your paint by hand, while others of you will be using dual action machines � this guide will cover both approaches. Okay, here we go...
How to safely and effectively correct Subaru paint by hand
If you choose to work by hand on Subaru paint you've got little chance of removing all of the defects present, so often the best bet is to use a glaze like Menzerna Finishing Touch Glaze or Blackfire Gloss Enhancing Polish to fill and hide the defects and then seal the finish with a decent wax or sealant (to boost the gloss and lock in the fillers). This approach is straightforward and relatively easy in terms of product application and removal. However, if you are happy to put in a lot of hard work, then it is possible to achieve a reasonable degree of correction by hand, providing you use a polish with a high degree of cut but that also breaks down effectively with just hand pressure. Few polishes have these characteristics, but one that does and that we highly recommend is Menzerna Intensive Polish. Here is an example of what can be achieved with it...
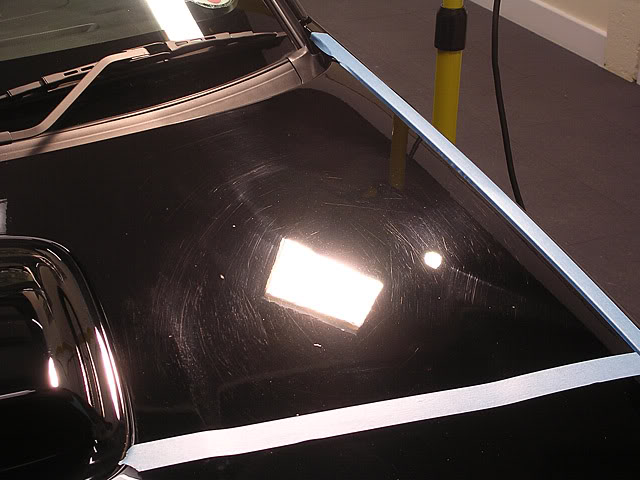
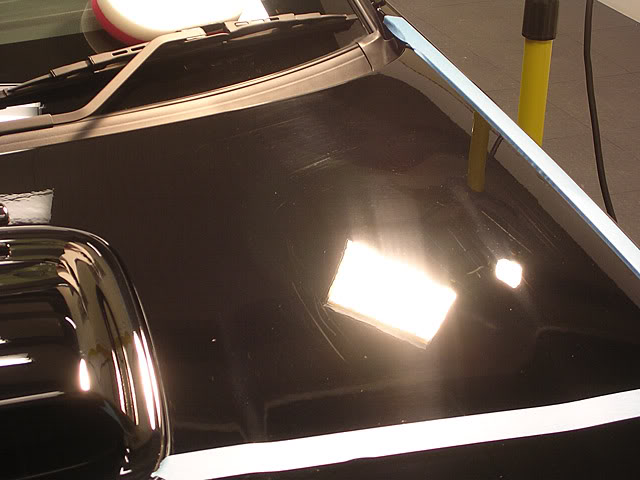
Before
All of the usual suspects can be seen here; marring, swirl marks and deeper random scratches. Once again note that swirl marks are not circular patterns. Instead, they are simply the result of a lighting source reflecting off of the edges of widespread multi-directional random fine scratches...
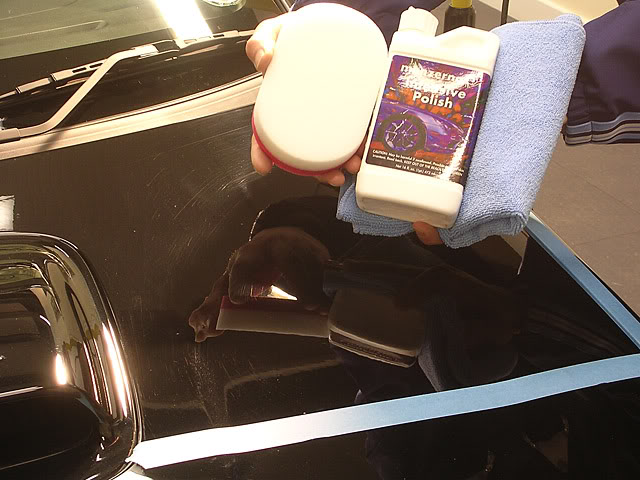
Step 1
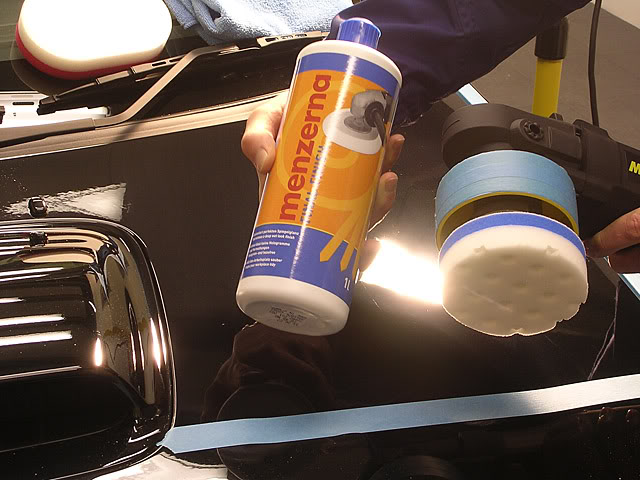
There are many different types of polish available on the market today, but one of the few that is capable of producing excellent results when working by hand on harder paints is Menzerna Intensive Polish. I recommend applying it using the white side of a German Pad, and buffing off the spent residue with a Poorboys Super Thick & Plush Towel...
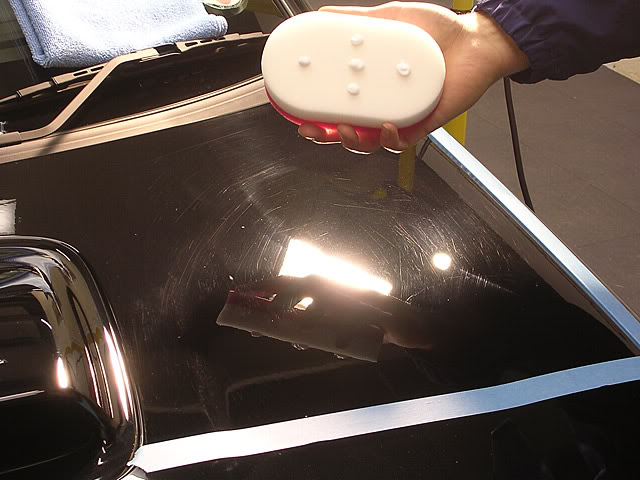
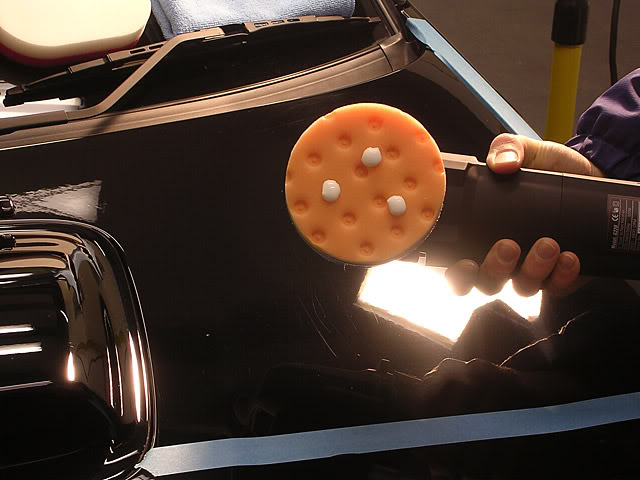
Step 2
This is how much polish I recommend using per 12�-18� square area. Use any less and very little correction will be done, use any more and you will struggle to break it down fully...
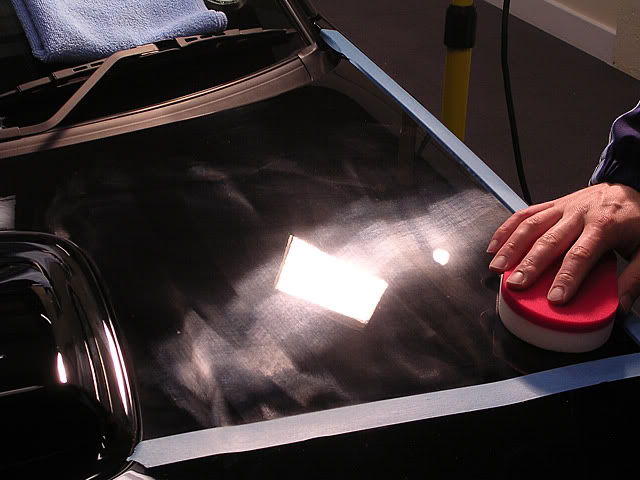
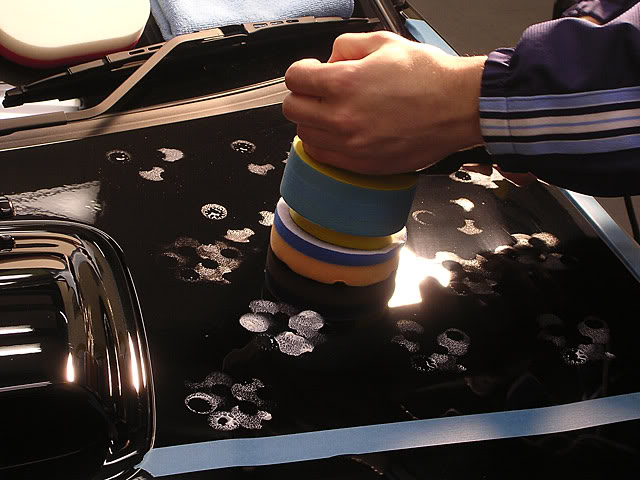
Step 3
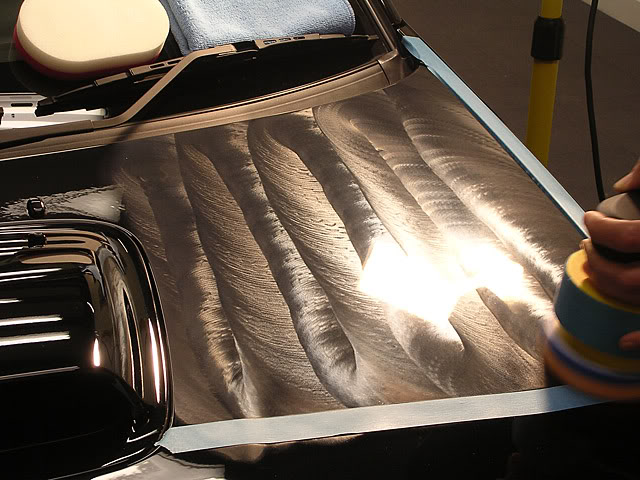
Note that when you first start working it in the residue is a solid looking white colour. You should work the polish in straight lines in all directions using firm pressure...

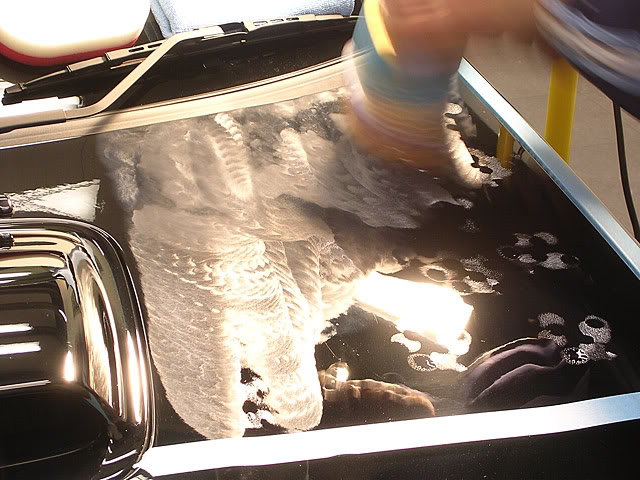
Step 4
Keep working the polish firmly until the residue thins out and turns clear � this indicates that the abrasives are properly broken down. Don�t be tempted to give up before this happens, otherwise the level of correction will be lower than expected, and you may also leave marring in the paint. I usually find each area needs to be worked for a good 3-4 minutes before the residue is ready to be buffed off...
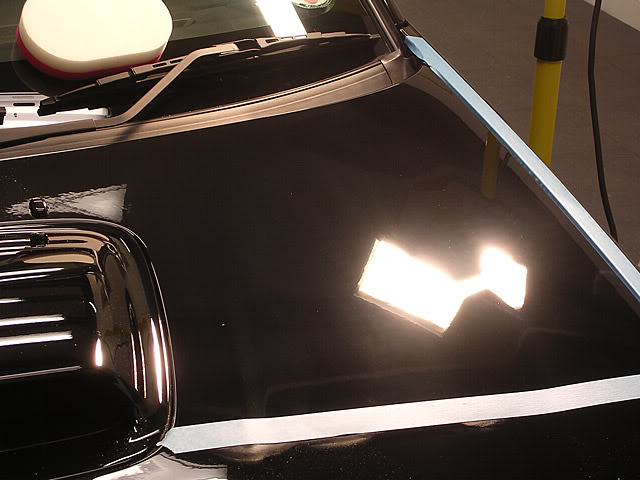
Step 5
Here is the result of 3-4 minutes of hard work...
Around 80% correction I would say, which isn�t bad at all considering the state of the paint to begin with. However, the deeper random scratches are still visible, and while you could of course keep on and on with the Intensive Polish in an attempt to remove them, a better bet is to accept from the off that full correction can only really be achieved using a machine. Right then, let�s take care of those remaining deeper scratches with a machine...
How to safely and effectively correct Subaru paint by dual action machine
Whilst it is relatively easy to swirl Subaru paints up, it can be very difficult to subsequently correct them, as we saw above. Subaru paints comprise the standard 3 layer system used by most car manufacturers (primer, pigment, lacquer), but the lacquer tends to be harder and slightly more elastic than most. To fully correct defects in such clearcoats requires polishes with ultra-fine, ultra-sharp particles that resist premature breakdown. The latest generation of polishes from Menzerna hits both of these nails squarely on the head and Lake Country's CCS Technology pads have been designed to work perfectly with these polishes. Here is the method I recommend using a dual action machine such as the newly released Meguiars Dual Action Polishing Machine...
Before
Just a quick reminder of the defects remaining after a tiring session of hand polishing...
Step 1
My product of choice for deeper defect removal in harder paints is Menzerna RD3.02. It is quite simply a brilliant product, having enough bite to tackle most defects, yet finishing down almost as well as a finishing polish...

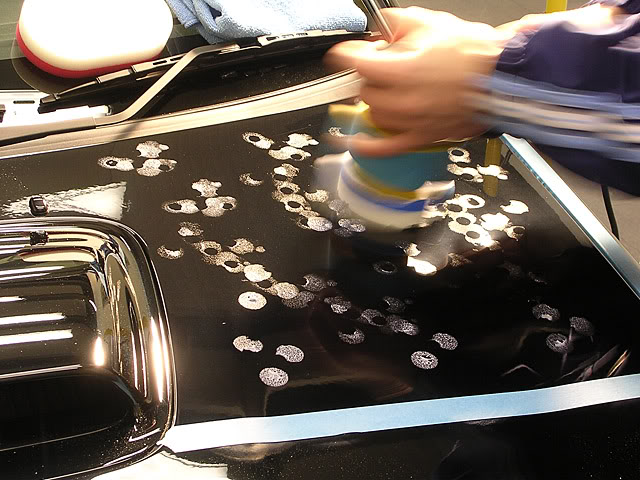
Step 2
In this example, I am using a small Lake Country CCS Light Cut Spot Pad in order to allow you to see more of how the polish is behaving as I work it; however, the method is identical whether you are working with spot pads or full size pads. This is how much polish I recommend using per 12�-18� square area. Use any less and very little correction will be done, use any more and you will struggle to break it down fully...
Step 3
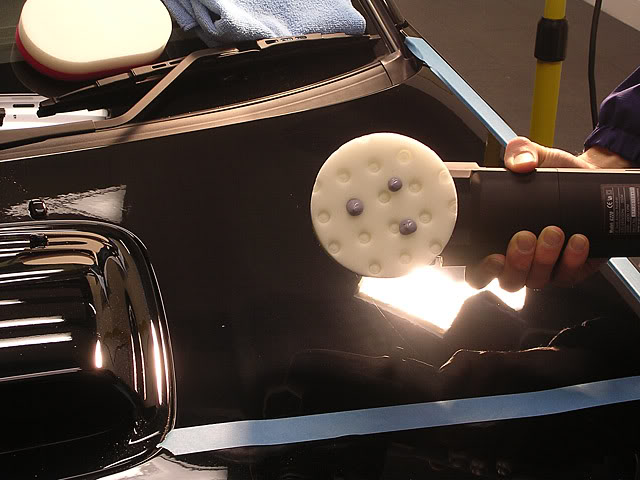
Before starting the machine, it is important to partially spread the polish by dabbing the pad evenly all over the work area...
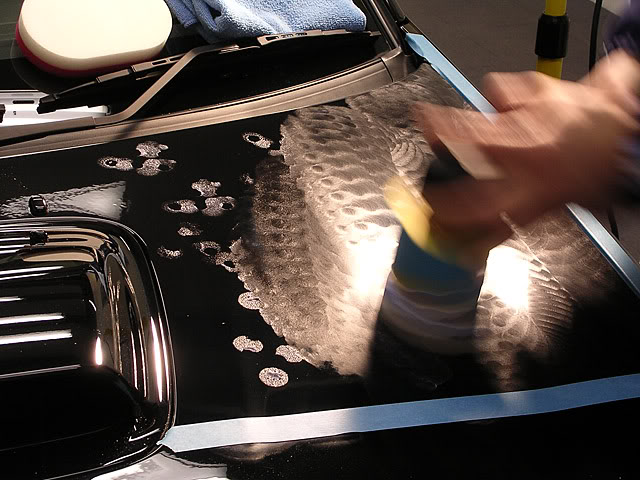
Step 4
With the pad touching the panel, switch the machine on at speed 1, and make several overlapping passes to spread the polish thinly and evenly over the work area...
Step 5
With the spreading done, increase the speed of the machine to between 4 and 5 on the dial. Then, applying light to moderate pressure, work the machine slowly back and forth over the work area in overlapping passes. I tend to favour moving the machine around at a rate of 4-6 inches per second. Note that during the early stages of the work the residue remains a solid looking white colour.
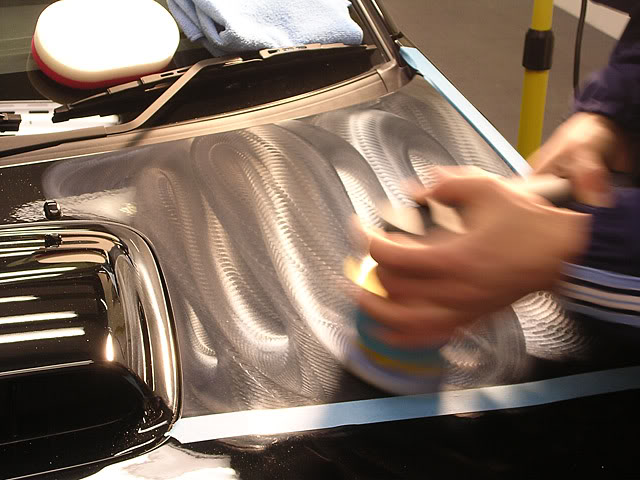
Step 6
After a few minutes you will see the residue thin out and turn clear � this indicates that the abrasives are properly broken down. Don�t be tempted to give up before this happens, otherwise the level of correction will be lower than expected, and you may also leave marring in the paint...
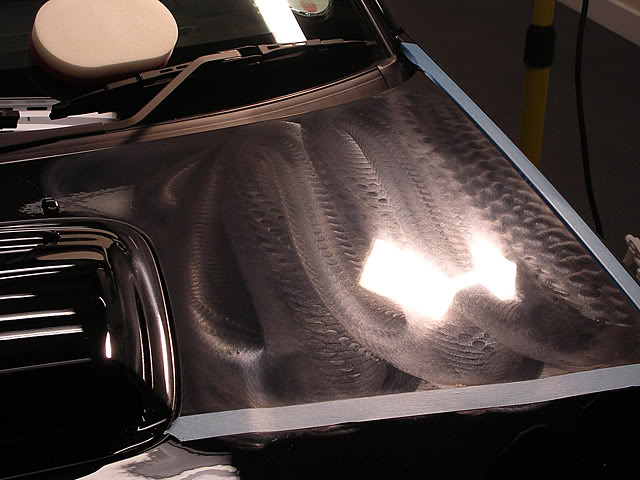
Step 7
Once the polish residue is fully broken down, switch off the machine with the pad held against the panel, and then buff off, turning the towel regularly (again I recommend buffing off the spent residue with a Poorboys Super Thick & Plush Towel). Here is the result of 3-4 minutes of much easier work...
Step 8
Now we have a finish that is 95% corrected, with just a few feint traces of previous deeper defects. However, the finish isn�t quite as sharp as it could be, so following up with an ultra-fine finishing polish is necessary if we want to achieve a truly stunning finish. My product of choice for refining hard paints is Menzerna 85RD. It is a superb finishing polish, with minimal cut but maximum gloss enhancing characteristics. You don�t quite appreciate how much sharper it makes paint look until you try it...
Step 9
In this example, I am using a small Lake Country CCS Polishing Spot Pad in order to allow you to see more of how the polish is behaving as I work it; however, the method is identical whether you are working with spot pads or full size pads. This is how much polish I recommend using per 12�-18� square area. Use any less and very little correction will be done, use any more and you will struggle to break it down fully...
Step 10
Before starting the machine, it is important to partially spread the polish by dabbing the pad evenly all over the work area...
Step 11
With the pad touching the panel, switch the machine on at speed 1, and make several overlapping passes to spread the polish thinly and evenly over the work area...
Step 12
With the spreading done, increase the speed of the machine to between 4 and 5 on the dial. Then, applying light to moderate pressure, work the machine slowly back and forth over the work area in overlapping passes. I tend to favour moving the machine around at a rate of 4-6 inches per second. Note that during the early stages of the work the residue remains a solid looking purple colour...
Step 13
After a few minutes you will see the residue thin out and turn clear � this indicates that the abrasives are properly broken down. Don�t be tempted to give up before this happens, otherwise the level of correction will be lower than expected, and you may also leave marring in the paint...
Step 14
Once the polish residue is fully broken down, switch off the machine with the pad held against the panel, and then buff off, turning the towel regularly (again I recommend buffing off the spent residue with a Poorboys Super Thick & Plush Towel). Here is the result of 3-4 minutes of refining the finish to perfection...
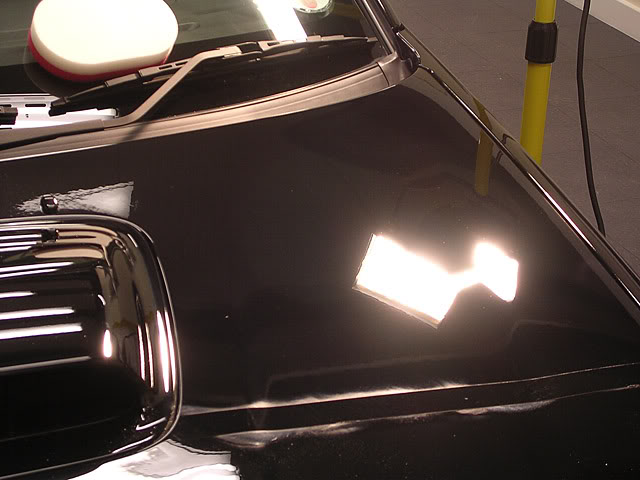
Around 99% correction or more I would say, and certainly enough to ensure a flawless looking finish in full sun conditions. With the polishing stages complete, all that remains is to seal the finish against the elements using either a sealant or wax. The choice of sealant or wax can greatly alter the way the paint looks, and for more information please see the other sticky threads discussing what to use and why on various coloured paints. I hope that helps some of you, and as always if anyone has any questions please don�t hesitate to ask either below, by pm, by e-mail or by phone.

How to safely and effectively correct Subaru paint by hand
If you choose to work by hand on Subaru paint you've got little chance of removing all of the defects present, so often the best bet is to use a glaze like Menzerna Finishing Touch Glaze or Blackfire Gloss Enhancing Polish to fill and hide the defects and then seal the finish with a decent wax or sealant (to boost the gloss and lock in the fillers). This approach is straightforward and relatively easy in terms of product application and removal. However, if you are happy to put in a lot of hard work, then it is possible to achieve a reasonable degree of correction by hand, providing you use a polish with a high degree of cut but that also breaks down effectively with just hand pressure. Few polishes have these characteristics, but one that does and that we highly recommend is Menzerna Intensive Polish. Here is an example of what can be achieved with it...
Before
All of the usual suspects can be seen here; marring, swirl marks and deeper random scratches. Once again note that swirl marks are not circular patterns. Instead, they are simply the result of a lighting source reflecting off of the edges of widespread multi-directional random fine scratches...
Step 1
There are many different types of polish available on the market today, but one of the few that is capable of producing excellent results when working by hand on harder paints is Menzerna Intensive Polish. I recommend applying it using the white side of a German Pad, and buffing off the spent residue with a Poorboys Super Thick & Plush Towel...
Step 2
This is how much polish I recommend using per 12�-18� square area. Use any less and very little correction will be done, use any more and you will struggle to break it down fully...
Step 3
Note that when you first start working it in the residue is a solid looking white colour. You should work the polish in straight lines in all directions using firm pressure...
Step 4
Keep working the polish firmly until the residue thins out and turns clear � this indicates that the abrasives are properly broken down. Don�t be tempted to give up before this happens, otherwise the level of correction will be lower than expected, and you may also leave marring in the paint. I usually find each area needs to be worked for a good 3-4 minutes before the residue is ready to be buffed off...
Step 5
Here is the result of 3-4 minutes of hard work...
Around 80% correction I would say, which isn�t bad at all considering the state of the paint to begin with. However, the deeper random scratches are still visible, and while you could of course keep on and on with the Intensive Polish in an attempt to remove them, a better bet is to accept from the off that full correction can only really be achieved using a machine. Right then, let�s take care of those remaining deeper scratches with a machine...
How to safely and effectively correct Subaru paint by dual action machine
Whilst it is relatively easy to swirl Subaru paints up, it can be very difficult to subsequently correct them, as we saw above. Subaru paints comprise the standard 3 layer system used by most car manufacturers (primer, pigment, lacquer), but the lacquer tends to be harder and slightly more elastic than most. To fully correct defects in such clearcoats requires polishes with ultra-fine, ultra-sharp particles that resist premature breakdown. The latest generation of polishes from Menzerna hits both of these nails squarely on the head and Lake Country's CCS Technology pads have been designed to work perfectly with these polishes. Here is the method I recommend using a dual action machine such as the newly released Meguiars Dual Action Polishing Machine...
Before
Just a quick reminder of the defects remaining after a tiring session of hand polishing...
Step 1
My product of choice for deeper defect removal in harder paints is Menzerna RD3.02. It is quite simply a brilliant product, having enough bite to tackle most defects, yet finishing down almost as well as a finishing polish...
Step 2
In this example, I am using a small Lake Country CCS Light Cut Spot Pad in order to allow you to see more of how the polish is behaving as I work it; however, the method is identical whether you are working with spot pads or full size pads. This is how much polish I recommend using per 12�-18� square area. Use any less and very little correction will be done, use any more and you will struggle to break it down fully...
Step 3
Before starting the machine, it is important to partially spread the polish by dabbing the pad evenly all over the work area...
Step 4
With the pad touching the panel, switch the machine on at speed 1, and make several overlapping passes to spread the polish thinly and evenly over the work area...
Step 5
With the spreading done, increase the speed of the machine to between 4 and 5 on the dial. Then, applying light to moderate pressure, work the machine slowly back and forth over the work area in overlapping passes. I tend to favour moving the machine around at a rate of 4-6 inches per second. Note that during the early stages of the work the residue remains a solid looking white colour.
Step 6
After a few minutes you will see the residue thin out and turn clear � this indicates that the abrasives are properly broken down. Don�t be tempted to give up before this happens, otherwise the level of correction will be lower than expected, and you may also leave marring in the paint...
Step 7
Once the polish residue is fully broken down, switch off the machine with the pad held against the panel, and then buff off, turning the towel regularly (again I recommend buffing off the spent residue with a Poorboys Super Thick & Plush Towel). Here is the result of 3-4 minutes of much easier work...
Step 8
Now we have a finish that is 95% corrected, with just a few feint traces of previous deeper defects. However, the finish isn�t quite as sharp as it could be, so following up with an ultra-fine finishing polish is necessary if we want to achieve a truly stunning finish. My product of choice for refining hard paints is Menzerna 85RD. It is a superb finishing polish, with minimal cut but maximum gloss enhancing characteristics. You don�t quite appreciate how much sharper it makes paint look until you try it...
Step 9
In this example, I am using a small Lake Country CCS Polishing Spot Pad in order to allow you to see more of how the polish is behaving as I work it; however, the method is identical whether you are working with spot pads or full size pads. This is how much polish I recommend using per 12�-18� square area. Use any less and very little correction will be done, use any more and you will struggle to break it down fully...
Step 10
Before starting the machine, it is important to partially spread the polish by dabbing the pad evenly all over the work area...
Step 11
With the pad touching the panel, switch the machine on at speed 1, and make several overlapping passes to spread the polish thinly and evenly over the work area...
Step 12
With the spreading done, increase the speed of the machine to between 4 and 5 on the dial. Then, applying light to moderate pressure, work the machine slowly back and forth over the work area in overlapping passes. I tend to favour moving the machine around at a rate of 4-6 inches per second. Note that during the early stages of the work the residue remains a solid looking purple colour...
Step 13
After a few minutes you will see the residue thin out and turn clear � this indicates that the abrasives are properly broken down. Don�t be tempted to give up before this happens, otherwise the level of correction will be lower than expected, and you may also leave marring in the paint...
Step 14
Once the polish residue is fully broken down, switch off the machine with the pad held against the panel, and then buff off, turning the towel regularly (again I recommend buffing off the spent residue with a Poorboys Super Thick & Plush Towel). Here is the result of 3-4 minutes of refining the finish to perfection...
Around 99% correction or more I would say, and certainly enough to ensure a flawless looking finish in full sun conditions. With the polishing stages complete, all that remains is to seal the finish against the elements using either a sealant or wax. The choice of sealant or wax can greatly alter the way the paint looks, and for more information please see the other sticky threads discussing what to use and why on various coloured paints. I hope that helps some of you, and as always if anyone has any questions please don�t hesitate to ask either below, by pm, by e-mail or by phone.

 24 January 2008, 10:02 PM
#6
Scooby Regular
iTrader: (8)

Join Date: Jan 2006
Location: MK
Posts: 4,931
Likes: 0
Received 0 Likes
on
0 Posts

Thanks PB any plans to sell dry sunny weather on your site (will it ever stop raining) I would have posted up a thank you thread but to be honest it must get embarrassing all this positive feedback you get
 , blown away as always with your customer service and the advice that you so freely give�
 Thanks again
Trending Topics
24 January 2008, 10:21 PM
#8
Former Sponsor
Thread Starter
iTrader: (3)
Join Date: Feb 2006
Location: AB51 0TH
Posts: 2,562
Likes: 0
Received 0 Likes
on
0 Posts
Thanks PB any plans to sell dry sunny weather on your site (will it ever stop raining) I would have posted up a thank you thread but to be honest it must get embarrassing all this positive feedback you get
, blown away as always with your customer service and the advice that you so freely give� Thanks again
24 January 2008, 10:30 PM
#9
Excellent!!! Was given a Meguiars Dual Action Polishing Machine for my birthday so will be ordering all the polishes from you soon...and now I have a lot more confidence about how to use it 
What's your opinion on Menzerna One Step Acrylic Jacket these days? I notice you don't stock it any more but I have some that I've never used - how would it work with my new machine do you think? Or maybe I should just use it up as a sealant?
What's your opinion on Menzerna One Step Acrylic Jacket these days? I notice you don't stock it any more but I have some that I've never used - how would it work with my new machine do you think? Or maybe I should just use it up as a sealant?
24 January 2008, 11:26 PM
#10
Former Sponsor
Thread Starter
iTrader: (3)
Join Date: Feb 2006
Location: AB51 0TH
Posts: 2,562
Likes: 0
Received 0 Likes
on
0 Posts
It didn't sell well enough to warrant keeping it... it seems most folk prefer dedicated products for polsihing and protection, which in many ways makes sense as one step products do tend to be compromised (not enough cut to polish well, limited durability due to lower sealant/wax content). I actually liked Acrylic Jacket a lot, and there's no reason not to use it unless you are happy to shell our for seperates so to speak. It gives a lovely sharp finish on most colours, with great reflectivity. You can also still top it up with the Menzerna quick detailer too.


 25 January 2008, 07:26 PM
#16
Scooby Regular

Join Date: May 2006
Location: York Scoobs. . . . Onwards & Upwards
Posts: 4,702
Likes: 0
Received 0 Likes
on
0 Posts
Is it easy to use a machine polisher with Subaru paint being so thin?
I ask this question because most people will be unsure of this, including myself. Can you actually go through the paint polishing applying to much pressure or does it depend on what product(s) you are using?
Ant
(Fed up of doing it by hand )
)
I ask this question because most people will be unsure of this, including myself. Can you actually go through the paint polishing applying to much pressure or does it depend on what product(s) you are using?
Ant
(Fed up of doing it by hand
)
25 January 2008, 08:00 PM
#17
Scooby Regular

Join Date: Jun 2007
Location: huddersfield WYIOC
Posts: 1,448
Likes: 0
Received 0 Likes
on
0 Posts
sounds a daft idea but thinking of purchasing the new Meguiars Dual Action
Polishing Machine. nipping down to local scrap yard for some panel's and having a practice 1st before attacking car.
Polishing Machine. nipping down to local scrap yard for some panel's and having a practice 1st before attacking car.
 26 January 2008, 07:36 PM
#21
Scooby Regular
iTrader: (8)
Join Date: Jan 2006
Location: MK
Posts: 4,931
Likes: 0
Received 0 Likes
on
0 Posts
yep you would to Add protection and give the desired effect i.e. �wet look�
85RD is just a Finishing polish not a wax or sealant (Received my one thanks PB with out the card I would have been very confused )
26 January 2008, 07:46 PM
#22
Scooby Regular
Join Date: May 2006
Location: York Scoobs. . . . Onwards & Upwards
Posts: 4,702
Likes: 0
Received 0 Likes
on
0 Posts

 29 January 2008, 03:20 PM
#27
Former Sponsor
Thread Starter
iTrader: (3)
Join Date: Feb 2006
Location: AB51 0TH
Posts: 2,562
Likes: 0
Received 0 Likes
on
0 Posts
Cheers folks; we're getting so busy these days that come spring/summer I may not be able to get on much, so the more I can put up like this should mean folk have most of their questions relating to our products answered without waiting around for days.
Okay, covering some of the questions. Firstly, thin paint. Doing the above process typically removes around 1% or so of total paint thickness; in many cases it's hard to measure the loss, even with highly precise gauges. So, it would be quite difficult to polish through the cleatcoat in normal situations. The only time this could happen more easily is if the car had been polished extremely hard in the past, using professional tools.
A much greater danger for newbie polishers on Impreza's is actually backing plate strike; for example, it's easy when running the machine up the bonnet to lose sight of the edge of the scoop; run the machine into this hard and the pad will bend up, potentially allowing the plate to strike the scoop, and more than likely taking a chunk out of it at the same time. Again the risk is minimal, but you do need to watch this when learning from scratch.
Some confusion is evident above with regard to the differences between polishes and protective products (waxes and sealants). The idea above was to correct the paint with a compound (RD3.02) then refine it with a finishing polish (85RD) ready for the subsequent application of either a wax or sealant to lock in and protect the finish. For ideas about what wax or sealant might be best for your colour paint, please see the guides at the top of the car care section (yes, a guide on blue will be appearing soon ).
).
For those of you interested in machine polishining kits, you may be interested in the new kits added to our store last night. These are designed to give you all the tools you need, simply add the polishes and buffing towels and you'll be ready to go. See here for details...
Meguiars G220 Dual Action Polishing Machine - Meguiars Car Care and Detailing Products
Finally I have asked the webmaster to make this a sticky, but he hasn't been replying to my pm's lately? Anyone know if I should still be speaking to Shaun about these matters, or someone lelse?
Okay, covering some of the questions. Firstly, thin paint. Doing the above process typically removes around 1% or so of total paint thickness; in many cases it's hard to measure the loss, even with highly precise gauges. So, it would be quite difficult to polish through the cleatcoat in normal situations. The only time this could happen more easily is if the car had been polished extremely hard in the past, using professional tools.
A much greater danger for newbie polishers on Impreza's is actually backing plate strike; for example, it's easy when running the machine up the bonnet to lose sight of the edge of the scoop; run the machine into this hard and the pad will bend up, potentially allowing the plate to strike the scoop, and more than likely taking a chunk out of it at the same time. Again the risk is minimal, but you do need to watch this when learning from scratch.
Some confusion is evident above with regard to the differences between polishes and protective products (waxes and sealants). The idea above was to correct the paint with a compound (RD3.02) then refine it with a finishing polish (85RD) ready for the subsequent application of either a wax or sealant to lock in and protect the finish. For ideas about what wax or sealant might be best for your colour paint, please see the guides at the top of the car care section (yes, a guide on blue will be appearing soon
).For those of you interested in machine polishining kits, you may be interested in the new kits added to our store last night. These are designed to give you all the tools you need, simply add the polishes and buffing towels and you'll be ready to go. See here for details...
Meguiars G220 Dual Action Polishing Machine - Meguiars Car Care and Detailing Products
Finally I have asked the webmaster to make this a sticky, but he hasn't been replying to my pm's lately? Anyone know if I should still be speaking to Shaun about these matters, or someone lelse?
01 February 2008, 05:04 PM
#29
Former Sponsor
Thread Starter
iTrader: (3)
Join Date: Feb 2006
Location: AB51 0TH
Posts: 2,562
Likes: 0
Received 0 Likes
on
0 Posts
Nope, Menzerna have cleverly adopted the same packaging for both bottles; the only way to tell them apart is to read the bar coded label on the bottom of the bottle. Bloomin' Germans! 
01 February 2008, 05:11 PM
#30
Scooby Regular

Join Date: Jan 2008
Location: Bradford
Posts: 211
Likes: 0
Received 0 Likes
on
0 Posts