DIY - Hawkeye Headlight Modification
 14 December 2011, 08:42 AM
#1
This is a modification I identified as a must have even before I bought the Hawkeye STI. It has taken since March to do the research, find the time and make sure my wife was out so I could use the oven 
Alot of stories about it being much harder then the Blobeye modification, that you have to take the bumper of and the headlights are very expensive if you break them......but I thought in Top Gear style 'How Hard Can It Be' !!!!!!
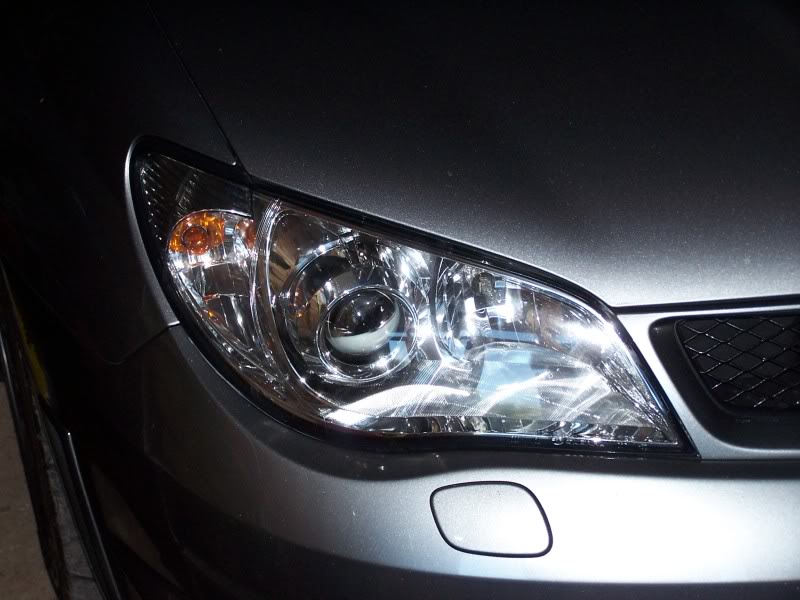
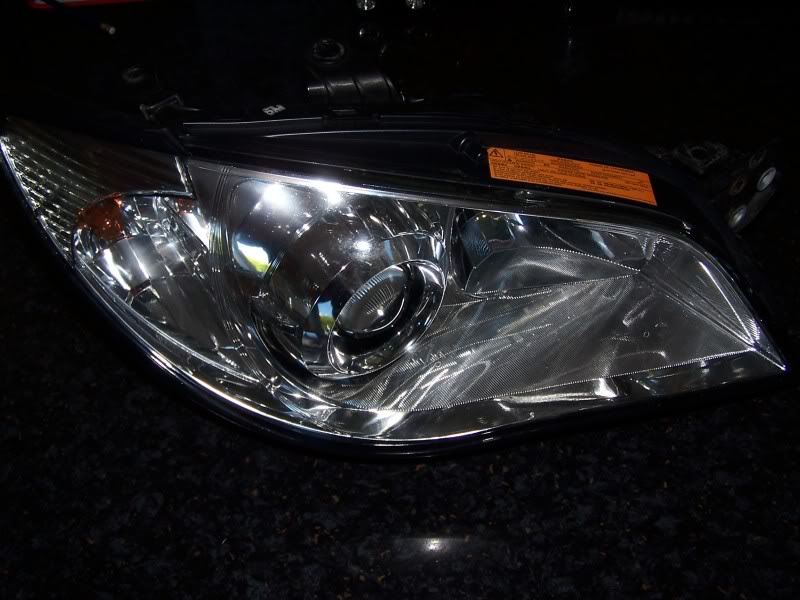
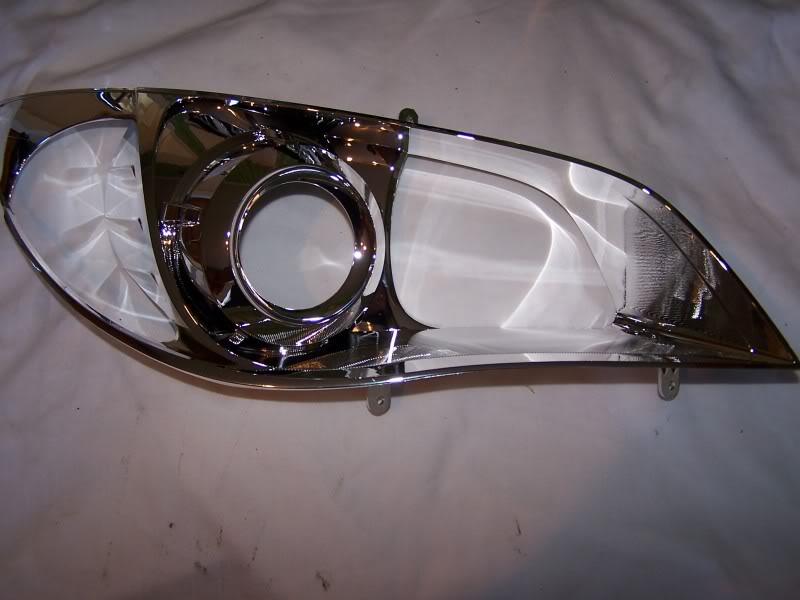
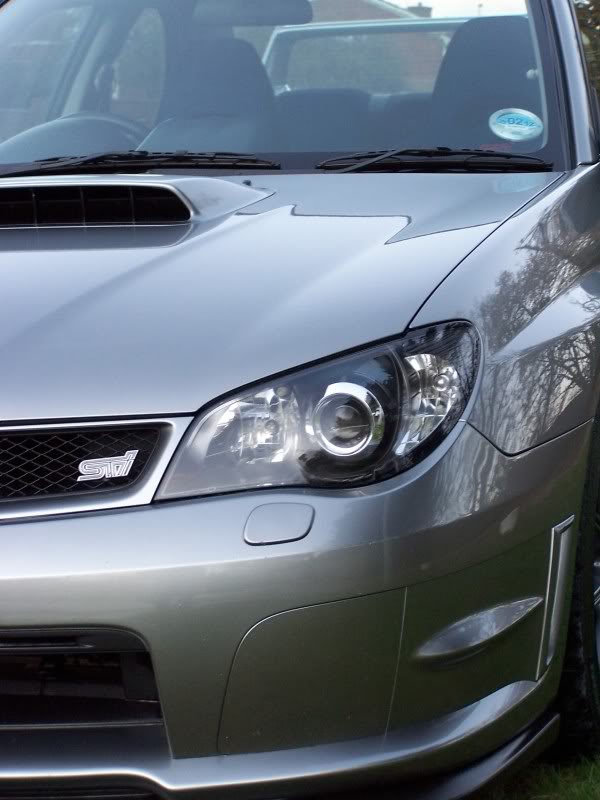
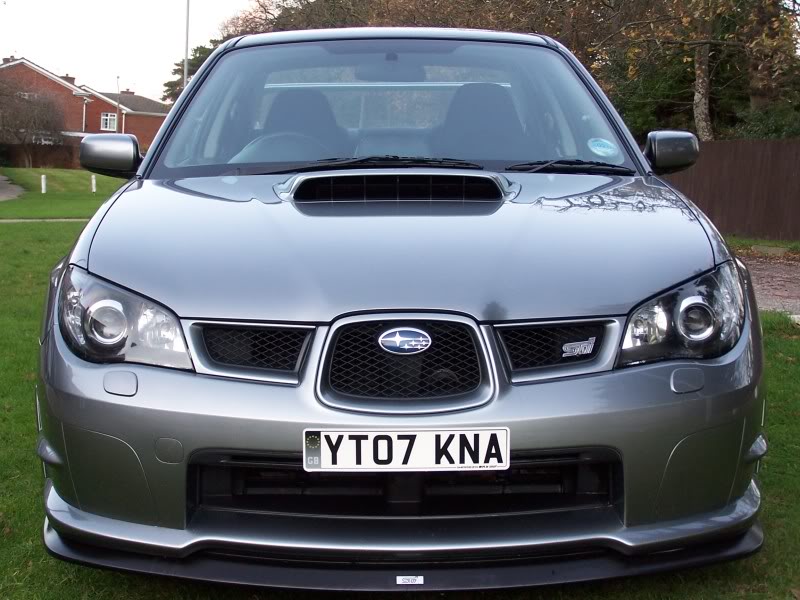
Before Modification :
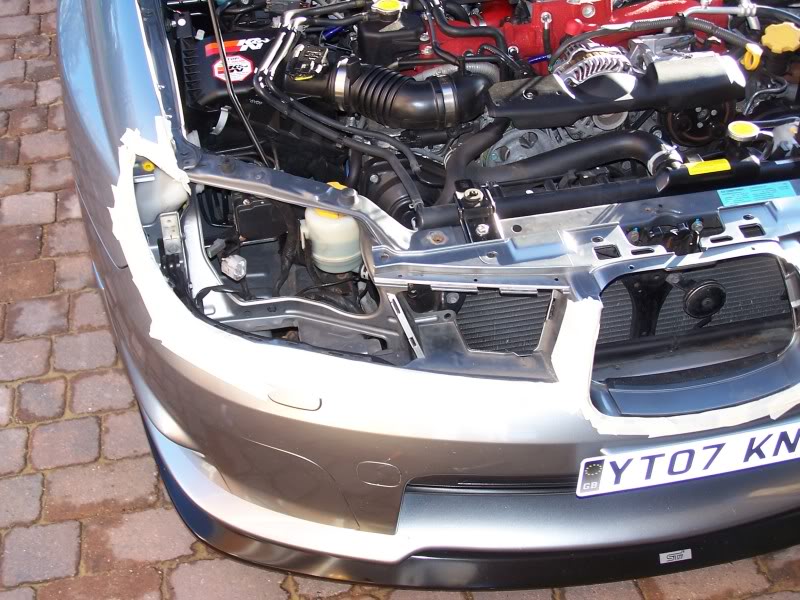
1. Mask up around edge of headlight and around edges of centre and left/right grills. These need to come out to gain access to the headlight mounting bolts.
2. Remove large trim clips from top edge of bumper, along slam panel.
3. Remove small trim clips holding grills in place, and 1 small trim clip on each top edge of headlight.
4. Remove centre grill by placing hand down behind and releasing 4 plastic clips, 2 easg side.
5. Remove left and right hand grills in a similar fashion. They are a bit of a fiddle but they will come out and you will realise why masking the bumper is a good idea.
6. Remove the single M6 bolt from the top of the headlight where it bolts to the slam panel.
7. Remove the 2 M6 bolts, 2 M6 nuts and 1 trim clip that hold the headlight in place that are located behind the grill you have just removed.
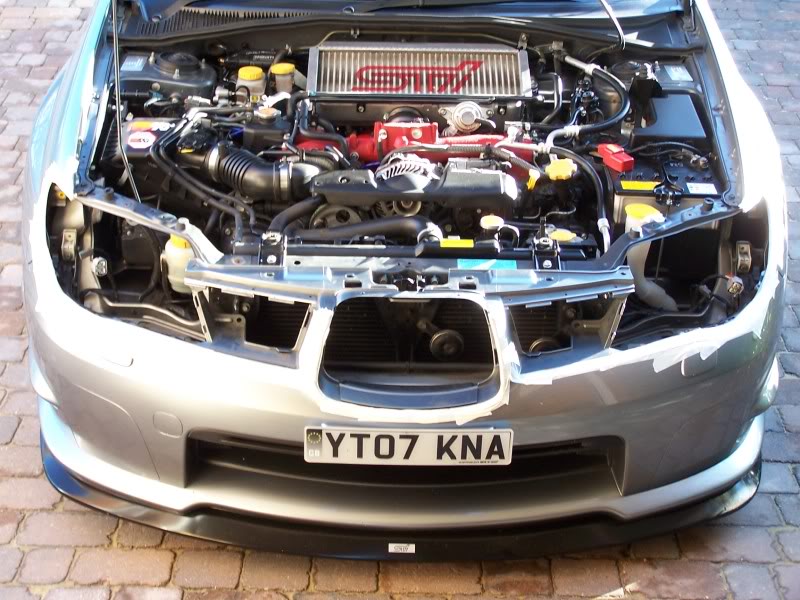
8. Now comes the removal of the light. Give it a wiggle and a tug on the outer/wing edge. It should partly pop out (If anyone has removed the sidelight on a classic they will be familiar with the pin/clip that hold it into the wing retainer). Tilt the light forward and try to get it under the slam panel as far as possible, making sure the mounting bracket that was un-bolted previously draws of it's mounting bolts . The light will not fully come out like this, but once it is as far as possible place your hand behind the light and lift up, you should now be able to see between the bottom of the light and the bumper to see what's stopping it coming forward. Basically nothing is stopping at apart from the base of the light just touching the top edge of the appature/bumper lip. A twist and a shove from behind should pop it out, all the time making sure the mounting bracket hasn't managed to slip back onto it's mount bolts.
9. At this stage it will be partly out bar from the loom connector. Disconnect these and your done. Steps 1 - 9 above took me approx 30 mins, alot quicker then i thought it would take.
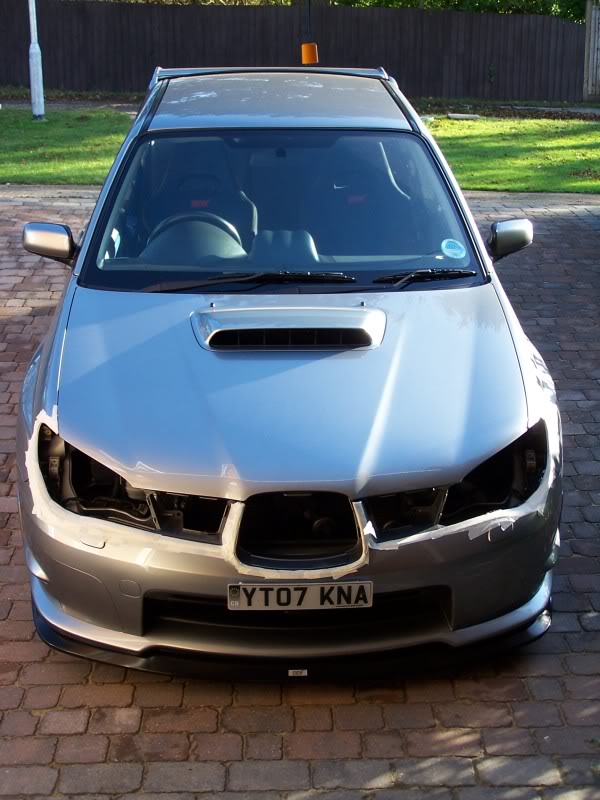
10. Repeat the above for the other light. I managed to get this one out alot quicker after learning on the other side.
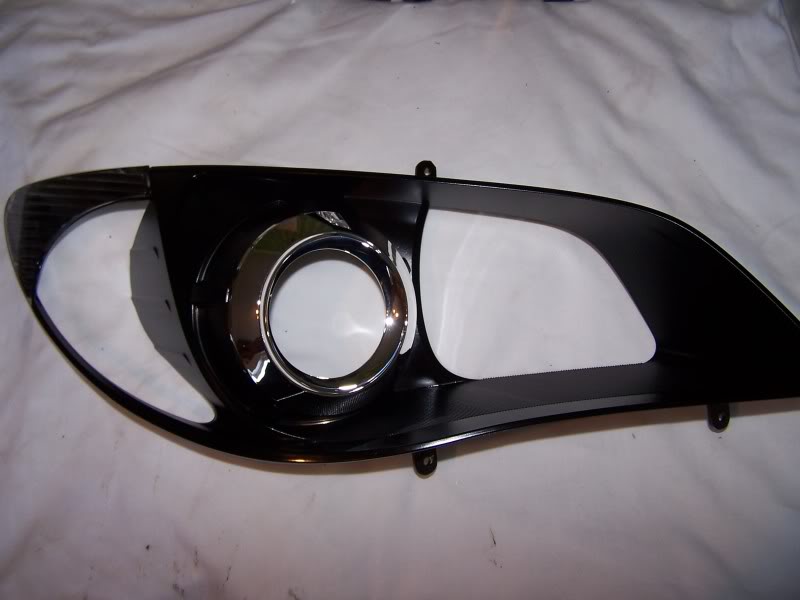
Looks quite cool don't it
11. Retire to the comfort of the kitchen breakfast bar
12. Remove the 5 self-tapping screws from the rear of the light.
13. I also removed the Ballast resistor that's screwed to the bottom of the housing, as didn't want to risk damaging that in the oven. Remove the 3 screws holding this in place and disonnect the cable harness from it.
14. Set oven to 100 DegC and timer to 10 mins, place light in oven on baking tray.
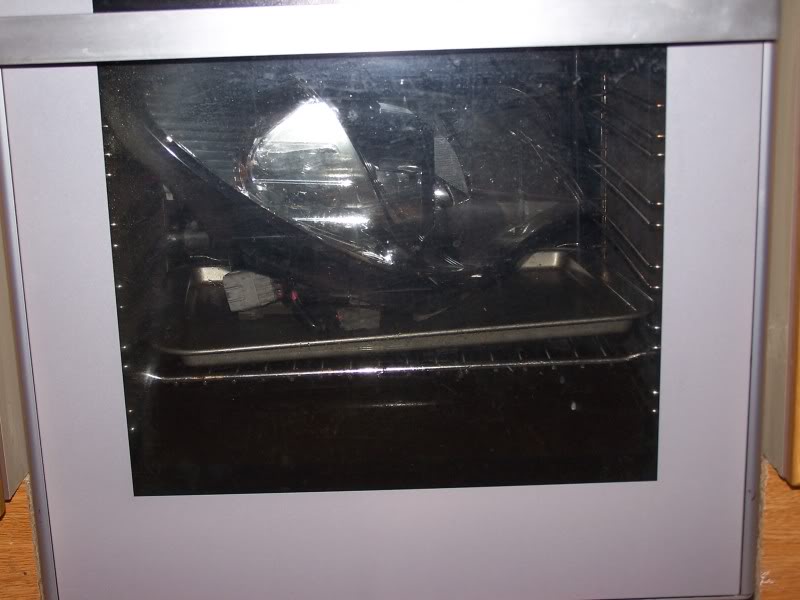
Yes I know the oven door needs cleaning, but that's not my department.......
15. Remove after 10 minutes and leaver open the headlight with a large flat blade screwdriver, it comes apart wuite easy. I started at the bottom incase the screwdriver damaged/marked the plastics. It did make small marks but by the time you work round to the top edge which will be visible when re-fitted, it comes off easier and hence doesn't mark the plastic. Once it is loose and you have a gap one end it can be pulled apart by hand. Cut or catch the excess sealant as you go.
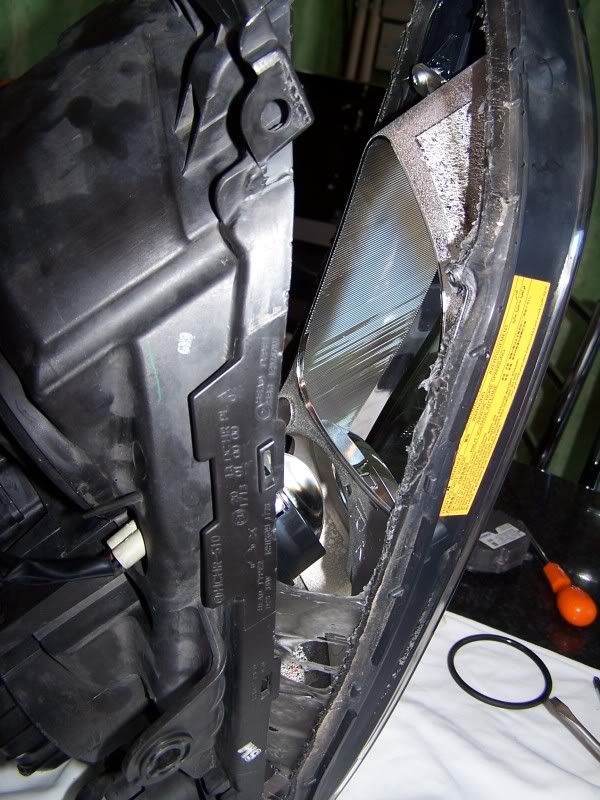
16. You now have 2 halves.
17. Put rear section to one side after tapping the stringy/excess sealant roughly back in place. Do the same with the front lense.
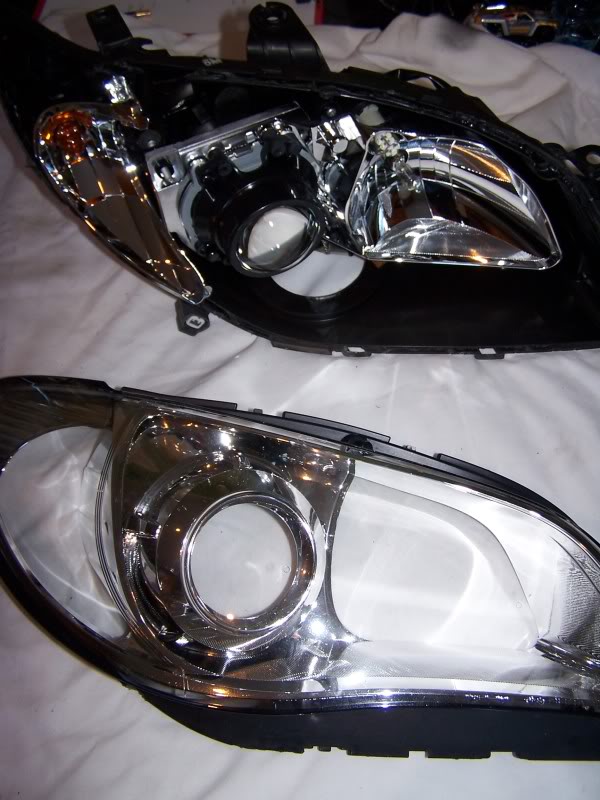
18. Remove the self-tapper screws that hold the refelctor in place on the front lense. Then remove the reflector
19. I then masked a ring around the HID apature to maintain a chrome ring. Some people spray the whole reflector black, other spray a coloured rings around the HID. But I decide to stick with chrome.
20. Spray reflector with colour of your choice. I used Satin Black Plasti-kote.
21. Remove masked HID ring and ready for re-fitting
22. Refit refelctor into lense.
23. To soften the sealant prior to refitting I placed both halves back in the over for 5 mins at 100DegC.
24. Remove from oven and while still hot quickly push two halves together and screw back in place.
25. Refit ballast resistor......job done in about 30 mins including paint (dried with hair drier)
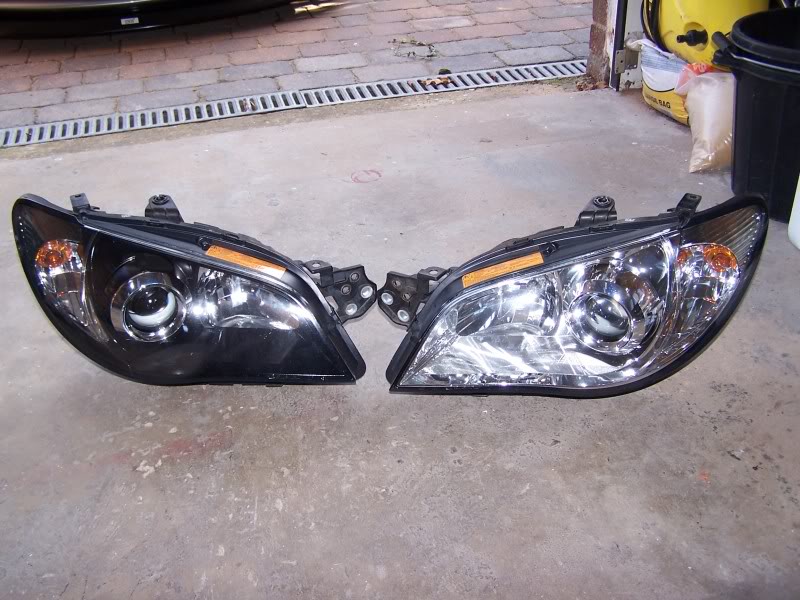
Compared lights :
26. Repeat for other side.
Took approx 2 hours to remove dismantle, paint and re-assemble both lights.
All back in the car, fitting back was easier then taking out, although highly recommend the use of plenty of masking tape to protect the surrounding area's.

And another little mod whils I was there....
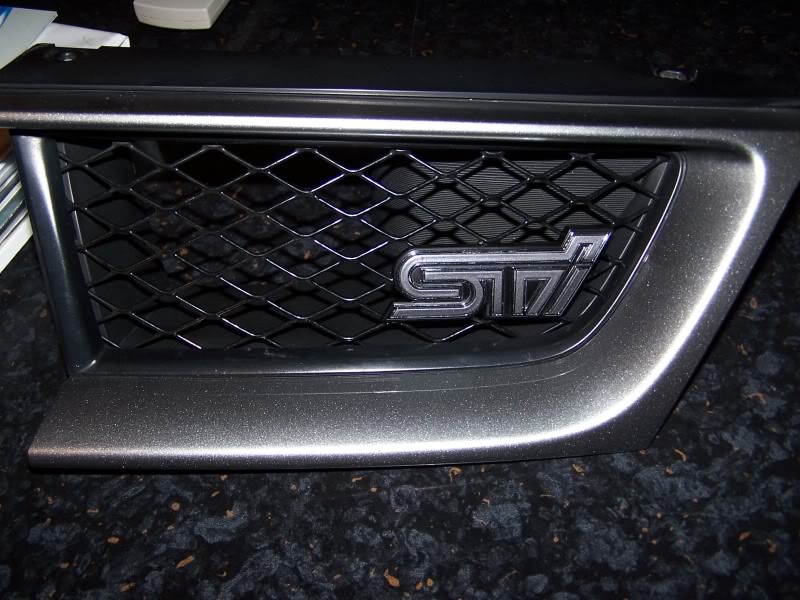
Been trying to De-Pink the front end and failed a few times with re-painting the STI badge to my satisfation (quite tricky due to the bi-colour embossed badge).
Decided to by an aftermarket Red badge.
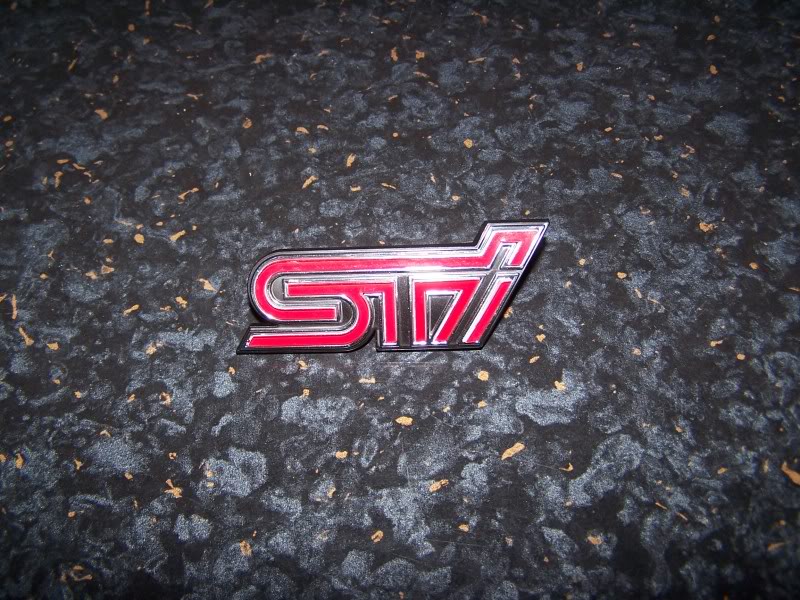
Found by pure fluke that the one I ordered had the 'Red' bits stuck to the 'Black' bit. A sharp blade and some cotton managed to seperate the 2.

Re-Paint the 'Red' bits
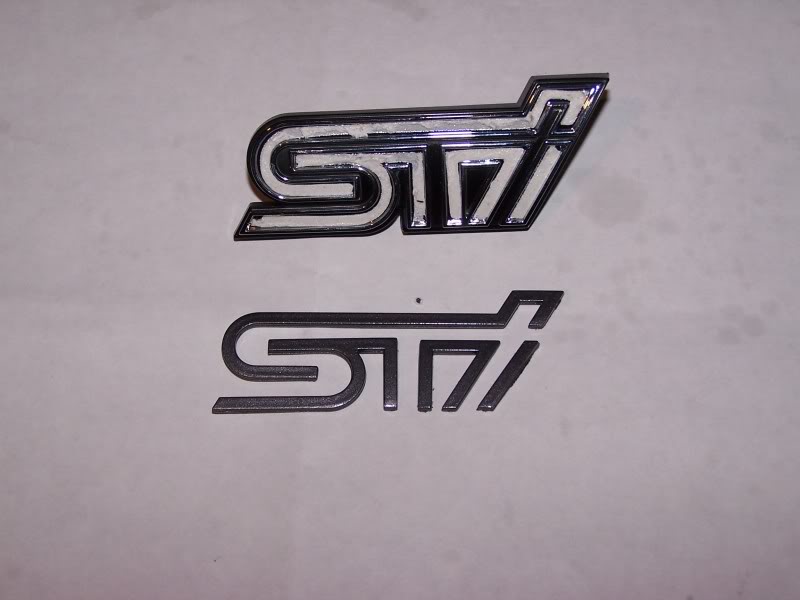
Re-Fit, while Grill was off the car
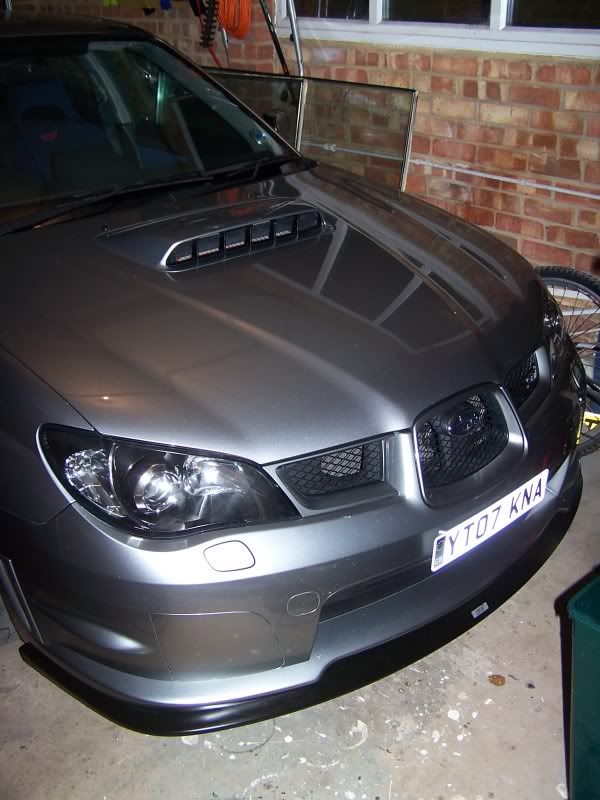
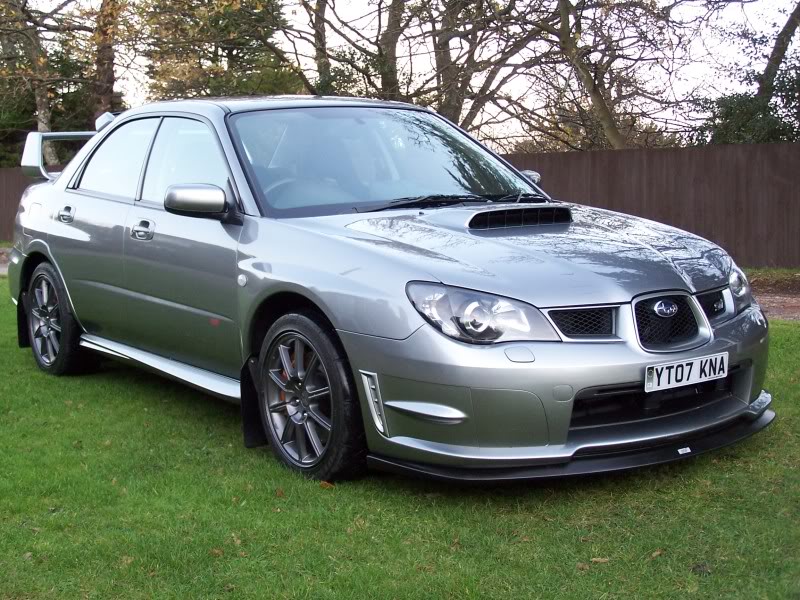
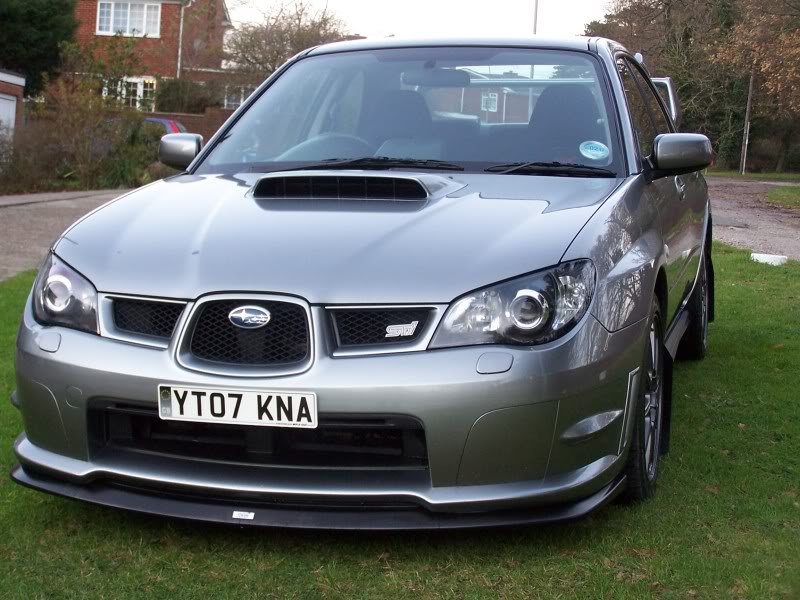
A few more pic's out in daylight.
Alot of stories about it being much harder then the Blobeye modification, that you have to take the bumper of and the headlights are very expensive if you break them......but I thought in Top Gear style 'How Hard Can It Be' !!!!!!
Before Modification :
1. Mask up around edge of headlight and around edges of centre and left/right grills. These need to come out to gain access to the headlight mounting bolts.
2. Remove large trim clips from top edge of bumper, along slam panel.
3. Remove small trim clips holding grills in place, and 1 small trim clip on each top edge of headlight.
4. Remove centre grill by placing hand down behind and releasing 4 plastic clips, 2 easg side.
5. Remove left and right hand grills in a similar fashion. They are a bit of a fiddle but they will come out and you will realise why masking the bumper is a good idea.
6. Remove the single M6 bolt from the top of the headlight where it bolts to the slam panel.
7. Remove the 2 M6 bolts, 2 M6 nuts and 1 trim clip that hold the headlight in place that are located behind the grill you have just removed.
8. Now comes the removal of the light. Give it a wiggle and a tug on the outer/wing edge. It should partly pop out (If anyone has removed the sidelight on a classic they will be familiar with the pin/clip that hold it into the wing retainer). Tilt the light forward and try to get it under the slam panel as far as possible, making sure the mounting bracket that was un-bolted previously draws of it's mounting bolts . The light will not fully come out like this, but once it is as far as possible place your hand behind the light and lift up, you should now be able to see between the bottom of the light and the bumper to see what's stopping it coming forward. Basically nothing is stopping at apart from the base of the light just touching the top edge of the appature/bumper lip. A twist and a shove from behind should pop it out, all the time making sure the mounting bracket hasn't managed to slip back onto it's mount bolts.
9. At this stage it will be partly out bar from the loom connector. Disconnect these and your done. Steps 1 - 9 above took me approx 30 mins, alot quicker then i thought it would take.
10. Repeat the above for the other light. I managed to get this one out alot quicker after learning on the other side.
Looks quite cool don't it
11. Retire to the comfort of the kitchen breakfast bar
12. Remove the 5 self-tapping screws from the rear of the light.
13. I also removed the Ballast resistor that's screwed to the bottom of the housing, as didn't want to risk damaging that in the oven. Remove the 3 screws holding this in place and disonnect the cable harness from it.
14. Set oven to 100 DegC and timer to 10 mins, place light in oven on baking tray.
Yes I know the oven door needs cleaning, but that's not my department.......
15. Remove after 10 minutes and leaver open the headlight with a large flat blade screwdriver, it comes apart wuite easy. I started at the bottom incase the screwdriver damaged/marked the plastics. It did make small marks but by the time you work round to the top edge which will be visible when re-fitted, it comes off easier and hence doesn't mark the plastic. Once it is loose and you have a gap one end it can be pulled apart by hand. Cut or catch the excess sealant as you go.
16. You now have 2 halves.
17. Put rear section to one side after tapping the stringy/excess sealant roughly back in place. Do the same with the front lense.
18. Remove the self-tapper screws that hold the refelctor in place on the front lense. Then remove the reflector
19. I then masked a ring around the HID apature to maintain a chrome ring. Some people spray the whole reflector black, other spray a coloured rings around the HID. But I decide to stick with chrome.
20. Spray reflector with colour of your choice. I used Satin Black Plasti-kote.
21. Remove masked HID ring and ready for re-fitting
22. Refit refelctor into lense.
23. To soften the sealant prior to refitting I placed both halves back in the over for 5 mins at 100DegC.
24. Remove from oven and while still hot quickly push two halves together and screw back in place.
25. Refit ballast resistor......job done in about 30 mins including paint (dried with hair drier)
Compared lights :
26. Repeat for other side.
Took approx 2 hours to remove dismantle, paint and re-assemble both lights.
All back in the car, fitting back was easier then taking out, although highly recommend the use of plenty of masking tape to protect the surrounding area's.
And another little mod whils I was there....
Been trying to De-Pink the front end and failed a few times with re-painting the STI badge to my satisfation (quite tricky due to the bi-colour embossed badge).
Decided to by an aftermarket Red badge.
Found by pure fluke that the one I ordered had the 'Red' bits stuck to the 'Black' bit. A sharp blade and some cotton managed to seperate the 2.
Re-Paint the 'Red' bits
Re-Fit, while Grill was off the car
A few more pic's out in daylight.
 14 December 2011, 10:03 AM
#3

Looks pretty good.
I wonder how easy it would be to fit a second pair of HID projectors to do just the main beam, since you already have them for dip?
Do you think a second pair would fit? The Morimoto Minis are quite compact....
Also, your car has HID dips as standard, yes?
Does it ALSO have both headlamp wash and SELF-LEVELLING HEADLIGHTS? Do they auto test every time you switch them on?
Thanks.
14 December 2011, 01:35 PM
#4
Looks pretty good.
I wonder how easy it would be to fit a second pair of HID projectors to do just the main beam, since you already have them for dip?
Do you think a second pair would fit? The Morimoto Minis are quite compact....
Also, your car has HID dips as standard, yes?
Does it ALSO have both headlamp wash and SELF-LEVELLING HEADLIGHTS? Do they auto test every time you switch them on?
Thanks.
I wonder how easy it would be to fit a second pair of HID projectors to do just the main beam, since you already have them for dip?
Do you think a second pair would fit? The Morimoto Minis are quite compact....
Also, your car has HID dips as standard, yes?
Does it ALSO have both headlamp wash and SELF-LEVELLING HEADLIGHTS? Do they auto test every time you switch them on?
Thanks.
The HID's flicker when you first turn on and take a couple of seconds to get up to full power. This would be no good for flashing or short bursts of high beam.
Yes they have Auto wash and levelling. sometime you can see the levelling working automatically.
Last edited by Scott.T; 14 December 2011 at 01:37 PM.
14 December 2011, 03:17 PM
#5
Scooby Regular

Join Date: Nov 2004
Posts: 825
Likes: 0
Received 0 Likes
on
0 Posts
Nice job , looks cool .
Just to add a little , the lights are easier to get in and out if you remove the bolts from the top of the wing . I haven't done this mod but did once have to split a hawkeye light as it was condensing up , I removed the hid box but left everything else in , when I replaced the light the dipped beam wouldn't work . Luckily a few days later it started working again but I would advise removing the bulbs etc before putting it in the oven .
Just to add a little , the lights are easier to get in and out if you remove the bolts from the top of the wing . I haven't done this mod but did once have to split a hawkeye light as it was condensing up , I removed the hid box but left everything else in , when I replaced the light the dipped beam wouldn't work . Luckily a few days later it started working again but I would advise removing the bulbs etc before putting it in the oven .

Trending Topics
 19 November 2012, 03:26 PM
#21
Scooby Regular

Join Date: May 2012
Location: Walsall
Posts: 38
Likes: 0
Received 0 Likes
on
0 Posts
Thanks for this Scott. I will be having a go in a couple of weeks.
Your car is currently for sale at http://www.grahamwalker.co.uk/subaru...hester-2459799
I looked at it last week, but in the end bought another Urban Grey Hawkeye as yours didn't seem to me to have the correct stamps
One final thing, where did you get the badge (I know you have to mod it) and number plates please? Nice touches
19 November 2012, 09:39 PM
#22
Thanks for this Scott. I will be having a go in a couple of weeks.
Your car is currently for sale at http://www.grahamwalker.co.uk/subaru...hester-2459799
I looked at it last week, but in the end bought another Urban Grey Hawkeye as yours didn't seem to me to have the correct stamps
One final thing, where did you get the badge (I know you have to mod it) and number plates please? Nice touches
Your car is currently for sale at http://www.grahamwalker.co.uk/subaru...hester-2459799
I looked at it last week, but in the end bought another Urban Grey Hawkeye as yours didn't seem to me to have the correct stamps
One final thing, where did you get the badge (I know you have to mod it) and number plates please? Nice touches
The last 2 Stamps in the book are mine, for the 18 months I had it, as had a stamp made up with a Log Number.
This tallies the log number on the stamp with the service sheet records (which are in accordance with the Subaru Service History chart) in the accompanying folder.
And IMHO worth more and better then any dealer.
It had 'dealer' history on it when I got it and it took a bloody age to free up the pads to get them out and inspect them. If you were to do it now they would literally fall out.
All a dealer does is a visual.....sometimes !!!!!
You may work out that I don't trust dealers, infact I don't trust my car with anyone. I've had Subaru's for 12 years and the only time one had left me for a workshop was for a Cambelt change.
If I do it myself I know it's done and it wasn't serviced by this weeks work experience guy.
A month doesn't go by without me being under the car, under the bonnet or cleaning or servicing something.
I've just got an A4 S-line as family wheels with full Audi 'Dealer' history. They didn't even spot a missfire which I felt before and after the service, and yes they did test drive it because they ticked the 'test drive' box on the service sheet.
Last edited by Scott.T; 19 November 2012 at 10:08 PM.
19 November 2012, 09:55 PM
#23
Plates were from www.fancyplates.com use the fancy plate configuration tool but select normal fonts and 2/3rd's size for the front. The rear is oversized to fit the space in the bumper, but I can't remember dimensions.
STi badge was from ebay, this one I think http://www.ebay.co.uk/itm/Subaru-STI...item2c657dce3a
19 November 2012, 10:44 PM
#24
Scooby Regular
Join Date: May 2012
Location: Walsall
Posts: 38
Likes: 0
Received 0 Likes
on
0 Posts
Thanks for the links Scott.
If I'd tracked you down earlier and known the full facts about the service history, I may have just bought the car and wouldn't now need to do the mods!
But glad you've enlighted me
One more thing Scott. I was told you needed heat-resistant paint for the lights. Did you find the Plasti-kote stood up to the heat OK?
Last edited by Da Matser; 19 November 2012 at 11:18 PM. Reason: Paint query
01 May 2013, 02:28 PM
#27
Scooby Regular

Join Date: Oct 2012
Location: north west
Posts: 102
Likes: 0
Received 0 Likes
on
0 Posts
The above content is great. However, after searching for something un-related I found this video of an American guy carrying out the same. Thought it was spot, so here's the link......
