Guide - How to fit a blobeye rear bumper and clusters to a bugeye
 07 September 2008, 07:25 PM
#1
I meant to do this an age ago after my HID fitting guide, but never got around to it.
Anyway, here we go again.
To carry out the transformation you'll need:
If you're attempting this I suggest you do it either on a dry day, or in a garage if you have one available; I got a bit wet half way through and had to borrow my neighbour's.
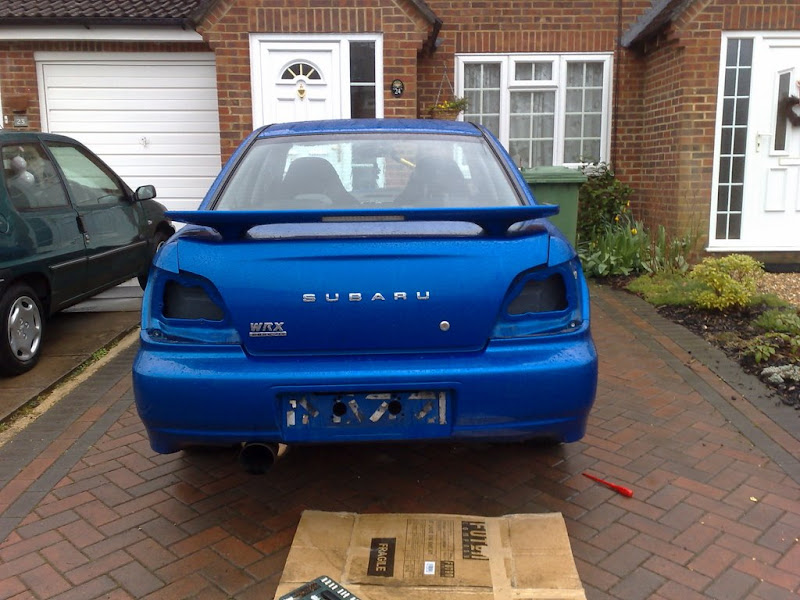
So this was the car before I started..

Apologies for the Lexus rear clusters people - I learnt my lesson - was never really that happy with them... .. so what better to do than change em
1) Remove the rear clusters
This is simple. First, undo the carpet retaining plugs and pull back the carpet in each corner of the boot.
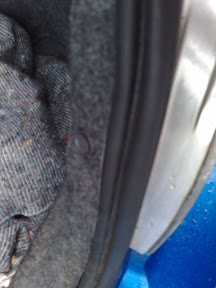
Then remove the 4 nuts located around each rear light cluster with a deep drive socket if you have one handy, or a spanner if you don't (think it's either 9 or 10mm).

At this point you should now be able to release the cluster from the body; pull it out gently and then disconnect the plug so you can remove the cluster.

Then do the same for the other side. You may also wish to remove your number plate from the rear of the car at the same time....
2) Removing the rear bumper
There are 3 plugs underneath the car (one each side and one in the centre) which you may need to release with something like a flat blade screwdriver. It's handy to have some of these spare as I found a couple of mine were actually broken or had just perished.

Once you've removed these, you need to unbolt the brackets holding the bumper in place inside each rear wheel arch. The pic below shows the bracket (black) on the bumper after removing it from the car. Two or three bolts to remove for each IIRC.

This should release the bumper each side of the car, so it should now only be attached by its fixings in the boot.
Inside the boot located near each light cluster, you should have two sets of nuts with threads covered by plastic lugs. Sorry, I didn't take a pic of these, but you can't miss em - they look like the obvious candidates for holding the bumper onto the car! Make sure you have hold of the bumper, or alternatively, tape it to the car when you undo these as the bumper will come free once you've undone all 4.
Here's a quick pic of the location of the mounting holes after the bumper has been removed:

You may also need to unscrew the two bolts which sit under each light cluster, and the plastic clips that are next to them. Sorry about the wooliness of that statement - I can't remember it was so long ago.
The bumper should now come free, but don't rip it off the car just yet as the license plate light will still be attached.
Using a screwdriver, remove the light from the bumper.

Then detach the bumper from the vehicle. It may be prudent to get a friend help you do this as the metal brackets can scratch your paintwork if you slip .
.
The car should now look something like this...

3) Clean!
Whilst the bumper's off, not a bad idea to wash out some of the crevices with a sponge and your choice of cleaning products.
4) Remove the v7 bumper brackets
The two small black metal brackets under each the space where each light cluster sits must be removed in order for the v8 bumper to fit or it won't sit right. I tried several variations but I couldn't get the v8 bumper to fit with these in place. TBH the bumper seems totally robust and firmly in place without them. No idea why they're really needed.
5) Fit the v8 rear bumper
If you need to, transfer the brackets from the old bumper to the new - if you have to do this, be warned it's a pain to do the ones on the side and you need to be VERY careful to remove them and then refit them without breaking the fixing points on the bumper.
Once you've done this though it's simple enough to sort out and is a reversal of the removal process.
Attach the license plate lamp housing to the new bumper, then get your friend to help you offer the new bumper into place to prevent scratches. Once it's located into the holes in the boot, re-attach it using the nuts inside the boot lining and the bolts by the clusters, and then the brackets inside each rear wheel arch.
Once this is done the bumper should feel firmly in place with little or no movement. Then refit your light clusters. If you didn't get a harness and bulbs with the version 8 light clusters you'll need to transfer the bulbs and looms over before you do this.


Don't forget to test the connections on the rear lights and ensure they're all still working. Oh, and re-attach the number plate. Finished product:

And that's it - job done. Took me about 4 hours because I didn't know where to find the fixings and I was trying to undo more than I had to and I had a couple of interruptions. I think if I was to do it now it shouldn't take more than 90 minutes tops. Happy modding!
Anyway, here we go again.
To carry out the transformation you'll need:
- A Version 8 Impreza rear bumper in the colour of your choosing
- Two version 8 rear light clusters (or version 9 if you prefer - either will fit)
- Phillips Screwdriver
- Large flat bladed screwdriver
- 8, 9 and 10mm spanners / sockets (you may not need all of these)
- A willing friend to make you tea and help you align the bumper
- Number plate fixings
If you're attempting this I suggest you do it either on a dry day, or in a garage if you have one available; I got a bit wet half way through and had to borrow my neighbour's.
So this was the car before I started..
Apologies for the Lexus rear clusters people - I learnt my lesson - was never really that happy with them...
.. so what better to do than change em 1) Remove the rear clusters
This is simple. First, undo the carpet retaining plugs and pull back the carpet in each corner of the boot.
Then remove the 4 nuts located around each rear light cluster with a deep drive socket if you have one handy, or a spanner if you don't (think it's either 9 or 10mm).
At this point you should now be able to release the cluster from the body; pull it out gently and then disconnect the plug so you can remove the cluster.
Then do the same for the other side. You may also wish to remove your number plate from the rear of the car at the same time....
2) Removing the rear bumper
There are 3 plugs underneath the car (one each side and one in the centre) which you may need to release with something like a flat blade screwdriver. It's handy to have some of these spare as I found a couple of mine were actually broken or had just perished.
Once you've removed these, you need to unbolt the brackets holding the bumper in place inside each rear wheel arch. The pic below shows the bracket (black) on the bumper after removing it from the car. Two or three bolts to remove for each IIRC.
This should release the bumper each side of the car, so it should now only be attached by its fixings in the boot.
Inside the boot located near each light cluster, you should have two sets of nuts with threads covered by plastic lugs. Sorry, I didn't take a pic of these, but you can't miss em - they look like the obvious candidates for holding the bumper onto the car! Make sure you have hold of the bumper, or alternatively, tape it to the car when you undo these as the bumper will come free once you've undone all 4.
Here's a quick pic of the location of the mounting holes after the bumper has been removed:
You may also need to unscrew the two bolts which sit under each light cluster, and the plastic clips that are next to them. Sorry about the wooliness of that statement - I can't remember it was so long ago.
The bumper should now come free, but don't rip it off the car just yet as the license plate light will still be attached.
Using a screwdriver, remove the light from the bumper.
Then detach the bumper from the vehicle. It may be prudent to get a friend help you do this as the metal brackets can scratch your paintwork if you slip
.The car should now look something like this...
3) Clean!
Whilst the bumper's off, not a bad idea to wash out some of the crevices with a sponge and your choice of cleaning products.
4) Remove the v7 bumper brackets
The two small black metal brackets under each the space where each light cluster sits must be removed in order for the v8 bumper to fit or it won't sit right. I tried several variations but I couldn't get the v8 bumper to fit with these in place. TBH the bumper seems totally robust and firmly in place without them. No idea why they're really needed.
5) Fit the v8 rear bumper
If you need to, transfer the brackets from the old bumper to the new - if you have to do this, be warned it's a pain to do the ones on the side and you need to be VERY careful to remove them and then refit them without breaking the fixing points on the bumper.
Once you've done this though it's simple enough to sort out and is a reversal of the removal process.
Attach the license plate lamp housing to the new bumper, then get your friend to help you offer the new bumper into place to prevent scratches. Once it's located into the holes in the boot, re-attach it using the nuts inside the boot lining and the bolts by the clusters, and then the brackets inside each rear wheel arch.
Once this is done the bumper should feel firmly in place with little or no movement. Then refit your light clusters. If you didn't get a harness and bulbs with the version 8 light clusters you'll need to transfer the bulbs and looms over before you do this.
Don't forget to test the connections on the rear lights and ensure they're all still working. Oh, and re-attach the number plate. Finished product:
And that's it - job done. Took me about 4 hours because I didn't know where to find the fixings and I was trying to undo more than I had to and I had a couple of interruptions. I think if I was to do it now it shouldn't take more than 90 minutes tops. Happy modding!
Last edited by MrNoisy; 02 June 2011 at 01:43 PM.
 07 September 2008, 11:39 PM
#2
Scooby Regular
iTrader: (4)
Join Date: Dec 2006
Location: London
Posts: 1,465
Likes: 0
Received 0 Likes
on
0 Posts
Nice write up mate I was looking for a guide when I had my bugeye, but ended up getting a hawkeye.
Sure alot of people will find this useful.
Car looks much better now without the lexus lights, and also newer
I was looking for a guide when I had my bugeye, but ended up getting a hawkeye.Sure alot of people will find this useful.
Car looks much better now without the lexus lights, and also newer
08 September 2008, 09:59 AM
#3
I did consider going the Hawkeye cluster route, but I think the only bugs that look suit are white ones. Well, that and the fact that I picked up a pair of nigh on new clusters from a blob for �30 posted!
 08 September 2008, 10:07 AM
#4
Scooby Regular
iTrader: (6)
Join Date: Apr 2005
Location: Stroke it baby!
Posts: 33,828
Likes: 0
Received 0 Likes
on
0 Posts
The reason you need to remove the brackets, is that the blob ones have a dip in them to accomodate the light cluster, the round bit.
I did the same conversion on mine and it made a huge improvement.

I did the same conversion on mine and it made a huge improvement.
08 September 2008, 02:40 PM
#5
Trending Topics
11 September 2008, 03:11 PM
#8
I do prefer the blobeye bumper shape - it is slightly different to the bugeye version, with a cut-in down the sides, and you lose that weird lip the bugeye one has at the towards the bottom so it's smoother at the back.
It's not a cheap conversion no, but I much prefer the finished look over the OEM items, crystal lights or not - hence why I did it
 . Still think the front and rear lights have been one of the best things I've done to the car.
It stands me at about �230, �30 for the clusters, �80 for the bumper and the rest for a complete sand down and respray as it was damaged when I bought it.
If you could get an unmarked bumper you could do it for less.
Note should point out that I note that Wiley has now changed to v8 rear clusters! Goes to show maybe it does make a difference
Last edited by MrNoisy; 18 March 2009 at 03:01 PM.

Thread
Thread Starter
Forum
Replies
Last Post
Mattybr5@MB Developments
Full Cars Breaking For Spares
33
29 August 2017 07:18 PM